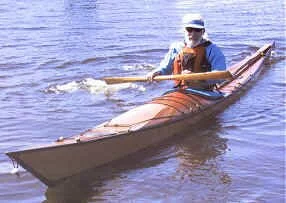
Thus the Sea Spirit Kayak was launched
|
|
|
| After paddling for a number of years in kayaks that I couldnít easily lay my back onto the rear deck I decided to take the plunge and build a kayak that I could comfortably lay my back onto the rear deck | |
|
|
|
| I didnít have any boat building know-how so I decided to build a kayak from a kit. The closest kit I could find that had a chance of meeting my criteria was a CLC North Bay. I bought the kit, and modified it to the best of my ability. It resulted in a pretty good kayak, but was to heavy as I used too much epoxy. |  |
|
|
|
| After that I decided to design my own by radically modifying the North Bay design. I just scaled the offsets to what I thought would result in the boat I wanted. I did that and built the boat. I also got some experience using graphite powder. The boat turned out to have little initial stability but good secondary stability. However, I still couldnít get the lay back I wanted. |  |
|
|
|
| Trying again with another North Bay, the result came out a lot closer to what I wanted. At this point I discovered hat hull design software was available and bought ProBasic from New Wave Systems. It was the same software that was used to design the North Bay. Now I could start with a clean sheet of paper and come up with the design I wanted. |  |
|
|
|
| Basing the design on a traditional Greenland skin kayak seemed like a good idea, but I didnít like the idea of the toes of my feet sticking up into the canvas deck. I wanted more room for my feet. The depth of a Greenland kayak made for rolling I learned was the width of oneís fist and a kayak made for racing was the width of oneís fist with an extended thumb. This meant for me the depth would be 3-1/2 in. for rolling and 5-1/4 in. for racing. I wasnít going to do any racing, but wanted to be able to roll a lot better than I could. (It took me a few years to learn how to roll, and my roll wasnít all that reliable) |  |
|
|
|
| I couldnít bring myself to build a kayak with a 3-1/2 in depth, but 5-1/4 in was in the realm of possibility. I figured that a plywood hull with anything less then 5 inches would break apart during the building process. I knew I needed at least an inch for the coaming height off the deck. That would bring the rear deck to 5 inches. So I opted for the 5-1/4 in just in case I would race. |  |
|
|
|
| Now, what about room for my feet? No way was it going to be 5-1/4 in. I surveyed a few kayaks, some that I owned and others I didnít, and came to the conclusion that 12 inches in depth from coaming front to the keel would be very comfortable. I proceeded with these dimensions in mind, and built a cardboard mockup of a hull design I created with ProBasic. The hull itself looked OK, but I was suspect of the 12 in front coaming depth. |  |
|
|
|
| The hull I built out of 4mm Okoume hull had a 5-1/4 in depth at the rear bulkhead. I built a cardboard mockup of a coaming section with a 12 in depth at its front and taped it to the hull. Sitting in the hull, I felt rather comfortable with plenty of room for my feet, but it just looked horrible to me. I then proceeded to lower the coaming, making compromises between appearances and comfort, and settled on 10-5/8 in. | 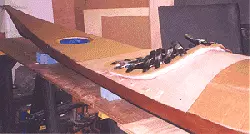 |
|
|
|
| VCP hatches are my favorite type, and find they are simpler to recess in a flat area. This meant the deck would have to slope from round to flat just before the area where the hatch would be. I chose the slope angle based on my toes clearing the underside of the deck by 1/4 in. | 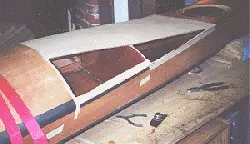 |
|
|
|
| I also wanted the bow and stern tips to be blunt and have a curved look to them, such as a traditional skin boat would have. This meant that the sides of the hull would have a gentle curve bending away from the natural curve of the hull. Adding contoured spacers at both at the deck line and the overhang at the bow and stern I decided could best do it. | 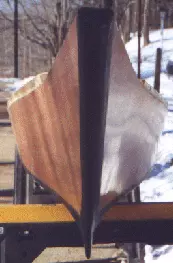 |
|
|
|
|
|
|